Hey, Real Programmer, I will share with you how to add or remove dynamically input fields using jQuery with laravel validation.some times we need this type of functionality in our web application.like some module has the same information with different values, in this case, we should do this using add or remove input fields dynamically using jQuery in our HTML form.
I created “tagslist” table and it’s model. I created a simple form and there you can add or remove name input fields and click on submit button insert those records in the database table. I also implemented a dynamic validation of laravel. So just follow the bellow step and get full example like a bellow screenshot.
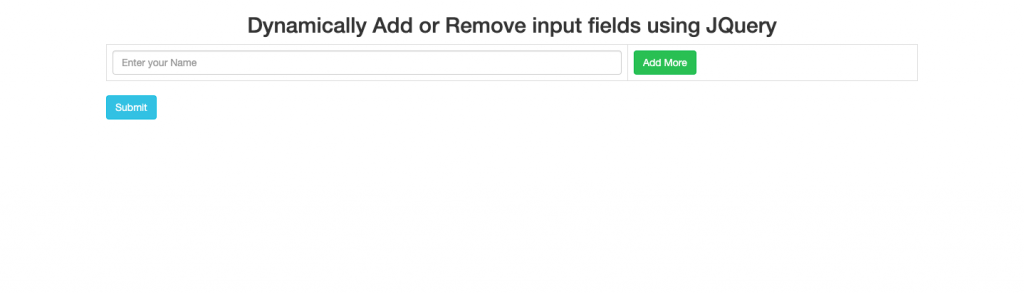
Laravel 7 Dynamically Add or Remove input fields using JQuery
Step 1: Install Laravel Setup
Step 2: Database Configuration
Step 3: Create tags list Table and Model
Step 4: Add Routes
Step 5: Create HomeController
Step 6: Create Blade File
Step 6: Run Server
Step 1: Install Laravel Application
I am going to show you scratch, So we require to get fresh current Laravel 5.5 version application using bellow command, So open your terminal OR command prompt and run bellow command:
composer create-project --prefer-dist laravel/laravel laravelDynamicGo inside of laravelDynamic folder
cd laravelDynamicStep 2: Setup Database Details inside of .env file
Database
DB_CONNECTION=mysql
DB_HOST=127.0.0.1
DB_PORT=3306
DB_DATABASE=laravelDynamic
DB_USERNAME=root
DB_PASSWORD=root@123
Step 3: Create tags list Table and Model
php artisan make:migration create_tagslist_tablePut code inside of tabslist_table
<?php

use Illuminate\Database\Migrations\Migration;
use Illuminate\Database\Schema\Blueprint;
use Illuminate\Support\Facades\Schema;

class CreateTagslistTable extends Migration
{
    /**
     * Run the migrations.
     *
     * @return void
     */
    public function up()
    {
        Schema::create('tagslist', function (Blueprint $table) {
            $table->increments('id');
            $table->string('name');
            $table->timestamps();
        });
    }

    /**
     * Reverse the migrations.
     *
     * @return void
     */
    public function down()
    {
        Schema::dropIfExists('tagslist');
    }
}
Now run migration my following command:
php artisan migrate
php artisan make:model TagList
Ok, so after run bellow command you will find app/TagList.php and put bellow content in TagList.php file:
app/TagList.php
<?php

namespace App;

use Illuminate\Database\Eloquent\Model;

class TagList extends Model
{
    public $table = "tagslist";
    public $fillable = ['name'];
}
Step 4: Add Route
Add Routes inside of routes/web.php
Route::get("addmore","HomeController@addMore");
Route::post("addmore","HomeController@addMorePost");
Step 5: Create HomeController
Here, now we should create new controller as HomeController if you haven’t created. So run bellow command and create new controller. bellow controller for create resource controller.
php artisan make:controller HomeControllerAfter bellow command, you will find a new file in this path app/Http/Controllers/HomeController.php.
In this controller will create seven methods by default as below methods:
1)addMore()
2)addMorePost()
So, let’s copy bellow code and put on HomeController.php file.
app/Http/Controllers/HomeController.php
<?php

namespace App\Http\Controllers;

use Illuminate\Http\Request;
use App\TagList;
use Validator;

class HomeController extends Controller
{
    public function addMore()
    {
        return view("addMore");
    }

    public function addMorePost(Request $request)
    {
        $rules = [];

        foreach($request->input('name') as $key => $value) {
            $rules["name.{$key}"] = 'required';
        }

        $validator = Validator::make($request->all(), $rules);

        if ($validator->passes()) {

            foreach($request->input('name') as $key => $value) {
                TagList::create(['name'=>$value]);
            }

            return response()->json(['success'=>'done']);
        }
        return response()->json(['error'=>$validator->errors()->all()]);
    }
}
Step 6: Create Blade File
So let’s just create following file and put bellow code.
resources/views/addMore.blade.php
<!DOCTYPE html>
<html>
<head>
    <title>Laravel Add More</title>
    <link rel="stylesheet" href="https://maxcdn.bootstrapcdn.com/bootstrap/3.3.6/css/bootstrap.min.css" />
    <script src="//ajax.googleapis.com/ajax/libs/jquery/1.12.4/jquery.min.js"></script>
    <script src="https://maxcdn.bootstrapcdn.com/bootstrap/3.3.6/js/bootstrap.min.js"></script>
    <meta name="csrf-token" content="{{ csrf_token() }}">
</head>
<body>
<div class="container">
    <h2 align="center">Dynamically Add or Remove input fields using JQuery</h2>
    <div class="form-group">
         <form name="add_name" id="add_name">


            <div class="alert alert-danger print-error-msg" style="display:none">
            <ul></ul>
            </div>


            <div class="alert alert-success print-success-msg" style="display:none">
            <ul></ul>
            </div>


            <div class="table-responsive">
                <table class="table table-bordered" id="dynamic_field">
                    <tr>
                        <td><input type="text" name="name[]" placeholder="Enter your Name" class="form-control name_list" /></td>
                        <td><button type="button" name="add" id="add" class="btn btn-success">Add More</button></td>
                    </tr>
                </table>
                <input type="button" name="submit" id="submit" class="btn btn-info" value="Submit" />
            </div>


         </form>
    </div>
</div>


<script type="text/javascript">
    $(document).ready(function(){
      var postURL = "<?php echo url('addmore'); ?>";
      var i=1;


      $('#add').click(function(){
           i++;
           $('#dynamic_field').append('<tr id="row'+i+'" class="dynamic-added"><td><input type="text" name="name[]" placeholder="Enter your Name" class="form-control name_list" /></td><td><button type="button" name="remove" id="'+i+'" class="btn btn-danger btn_remove">X</button></td></tr>');
      });


      $(document).on('click', '.btn_remove', function(){
           var button_id = $(this).attr("id");
           $('#row'+button_id+'').remove();
      });


      $.ajaxSetup({
          headers: {
            'X-CSRF-TOKEN': $('meta[name="csrf-token"]').attr('content')
          }
      });


      $('#submit').click(function(){
           $.ajax({
                url:postURL,
                method:"POST",
                data:$('#add_name').serialize(),
                type:'json',
                success:function(data)
                {
                    if(data.error){
                        printErrorMsg(data.error);
                    }else{
                        i=1;
                        $('.dynamic-added').remove();
                        $('#add_name')[0].reset();
                        $(".print-success-msg").find("ul").html('');
                        $(".print-success-msg").css('display','block');
                        $(".print-error-msg").css('display','none');
                        $(".print-success-msg").find("ul").append('<li>Record Inserted Successfully.</li>');
                    }
                }
           });
      });


      function printErrorMsg (msg) {
         $(".print-error-msg").find("ul").html('');
         $(".print-error-msg").css('display','block');
         $(".print-success-msg").css('display','none');
         $.each( msg, function( key, value ) {
            $(".print-error-msg").find("ul").append('<li>'+value+'</li>');
         });
      }
    });
</script>
</body>
</html>
Step 7 : Run Server
php artisan serve