
Modify The AWS Instance Region
- Log in to the AWS Management Console.
- If required, use the region selector in the top right corner to switch to the region where your instance was launched.
- Select your instance and then select the “Create Image” option in the “Actions” menu.
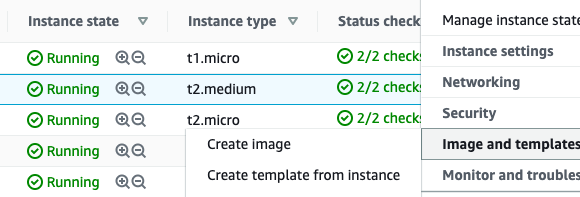
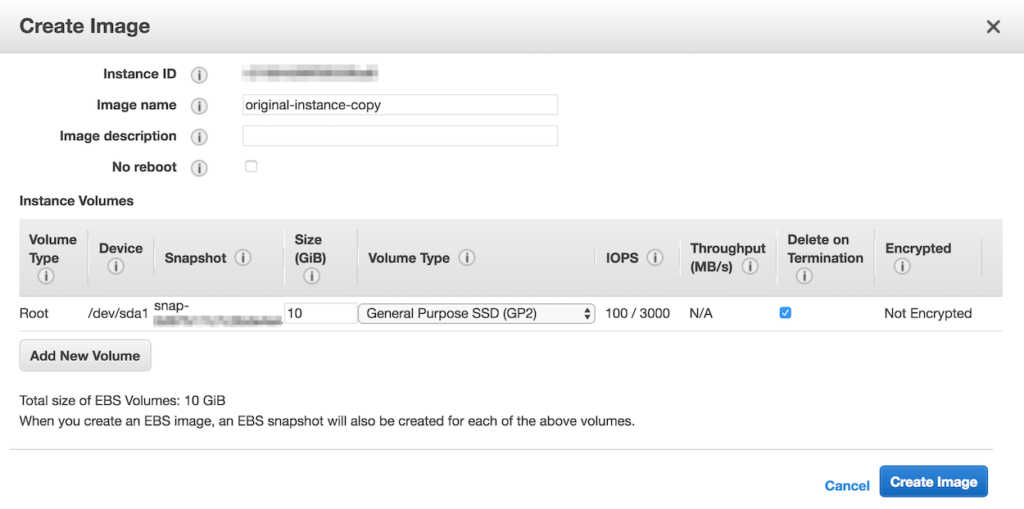
Specify the name for the new image and then click the “Create Image” button.
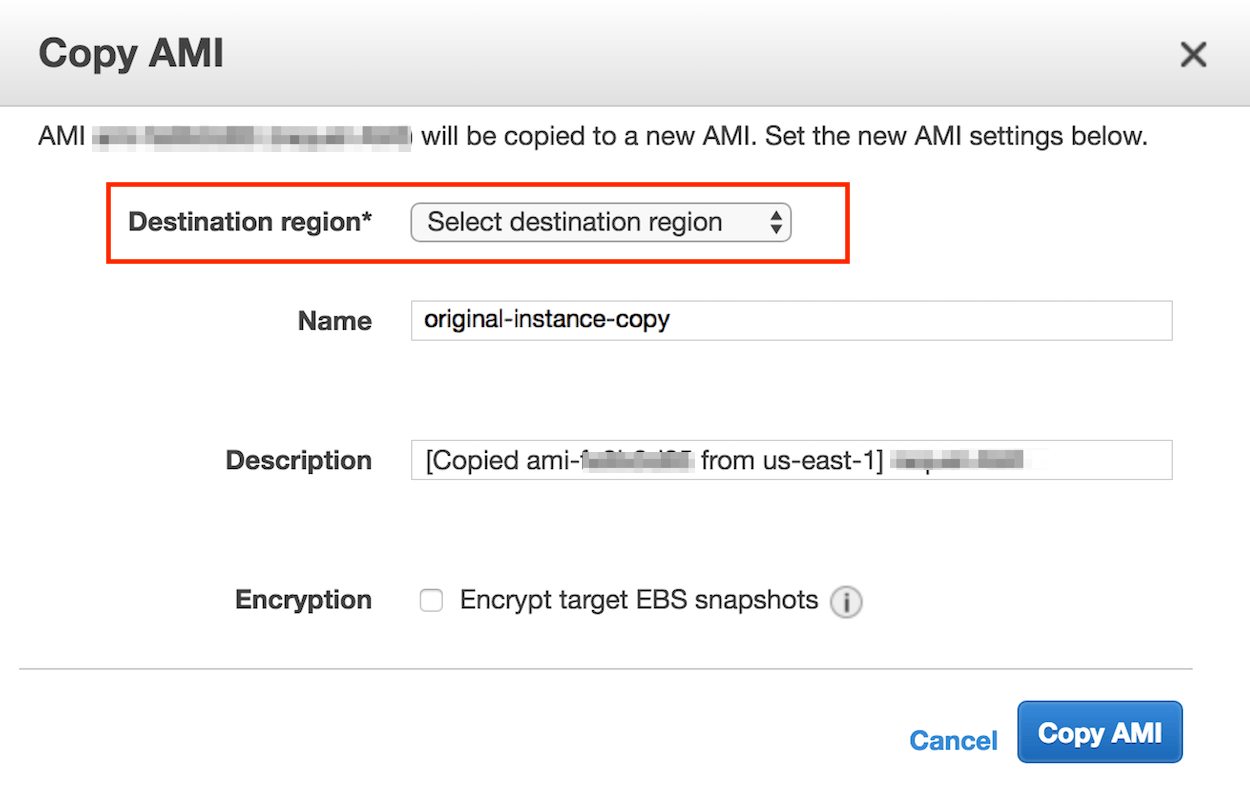
- From the “AMIs” menu in the navigation panel, select the new image and select the “Copy AMI” option in the “Actions” menu.
- Specify the new region in the resulting dialog window and click the “Copy AMI” button.
You will now be able to launch a new instance with the image in the new region. Follow the steps below:
- In the top menu of the EC2 dashboard, select the region where you have copied the AMI. You will see the list of the available AMIs for that region.
- Select the image you have copied from the list and click “Actions -> Launch”:
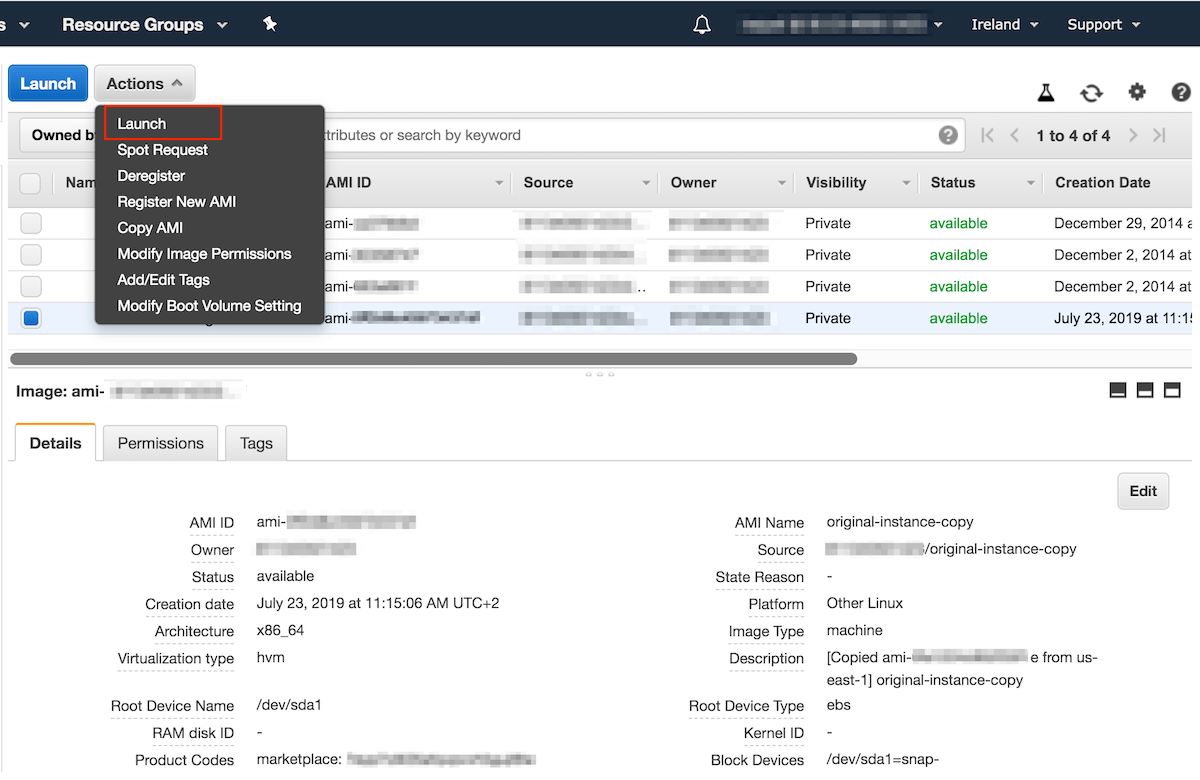
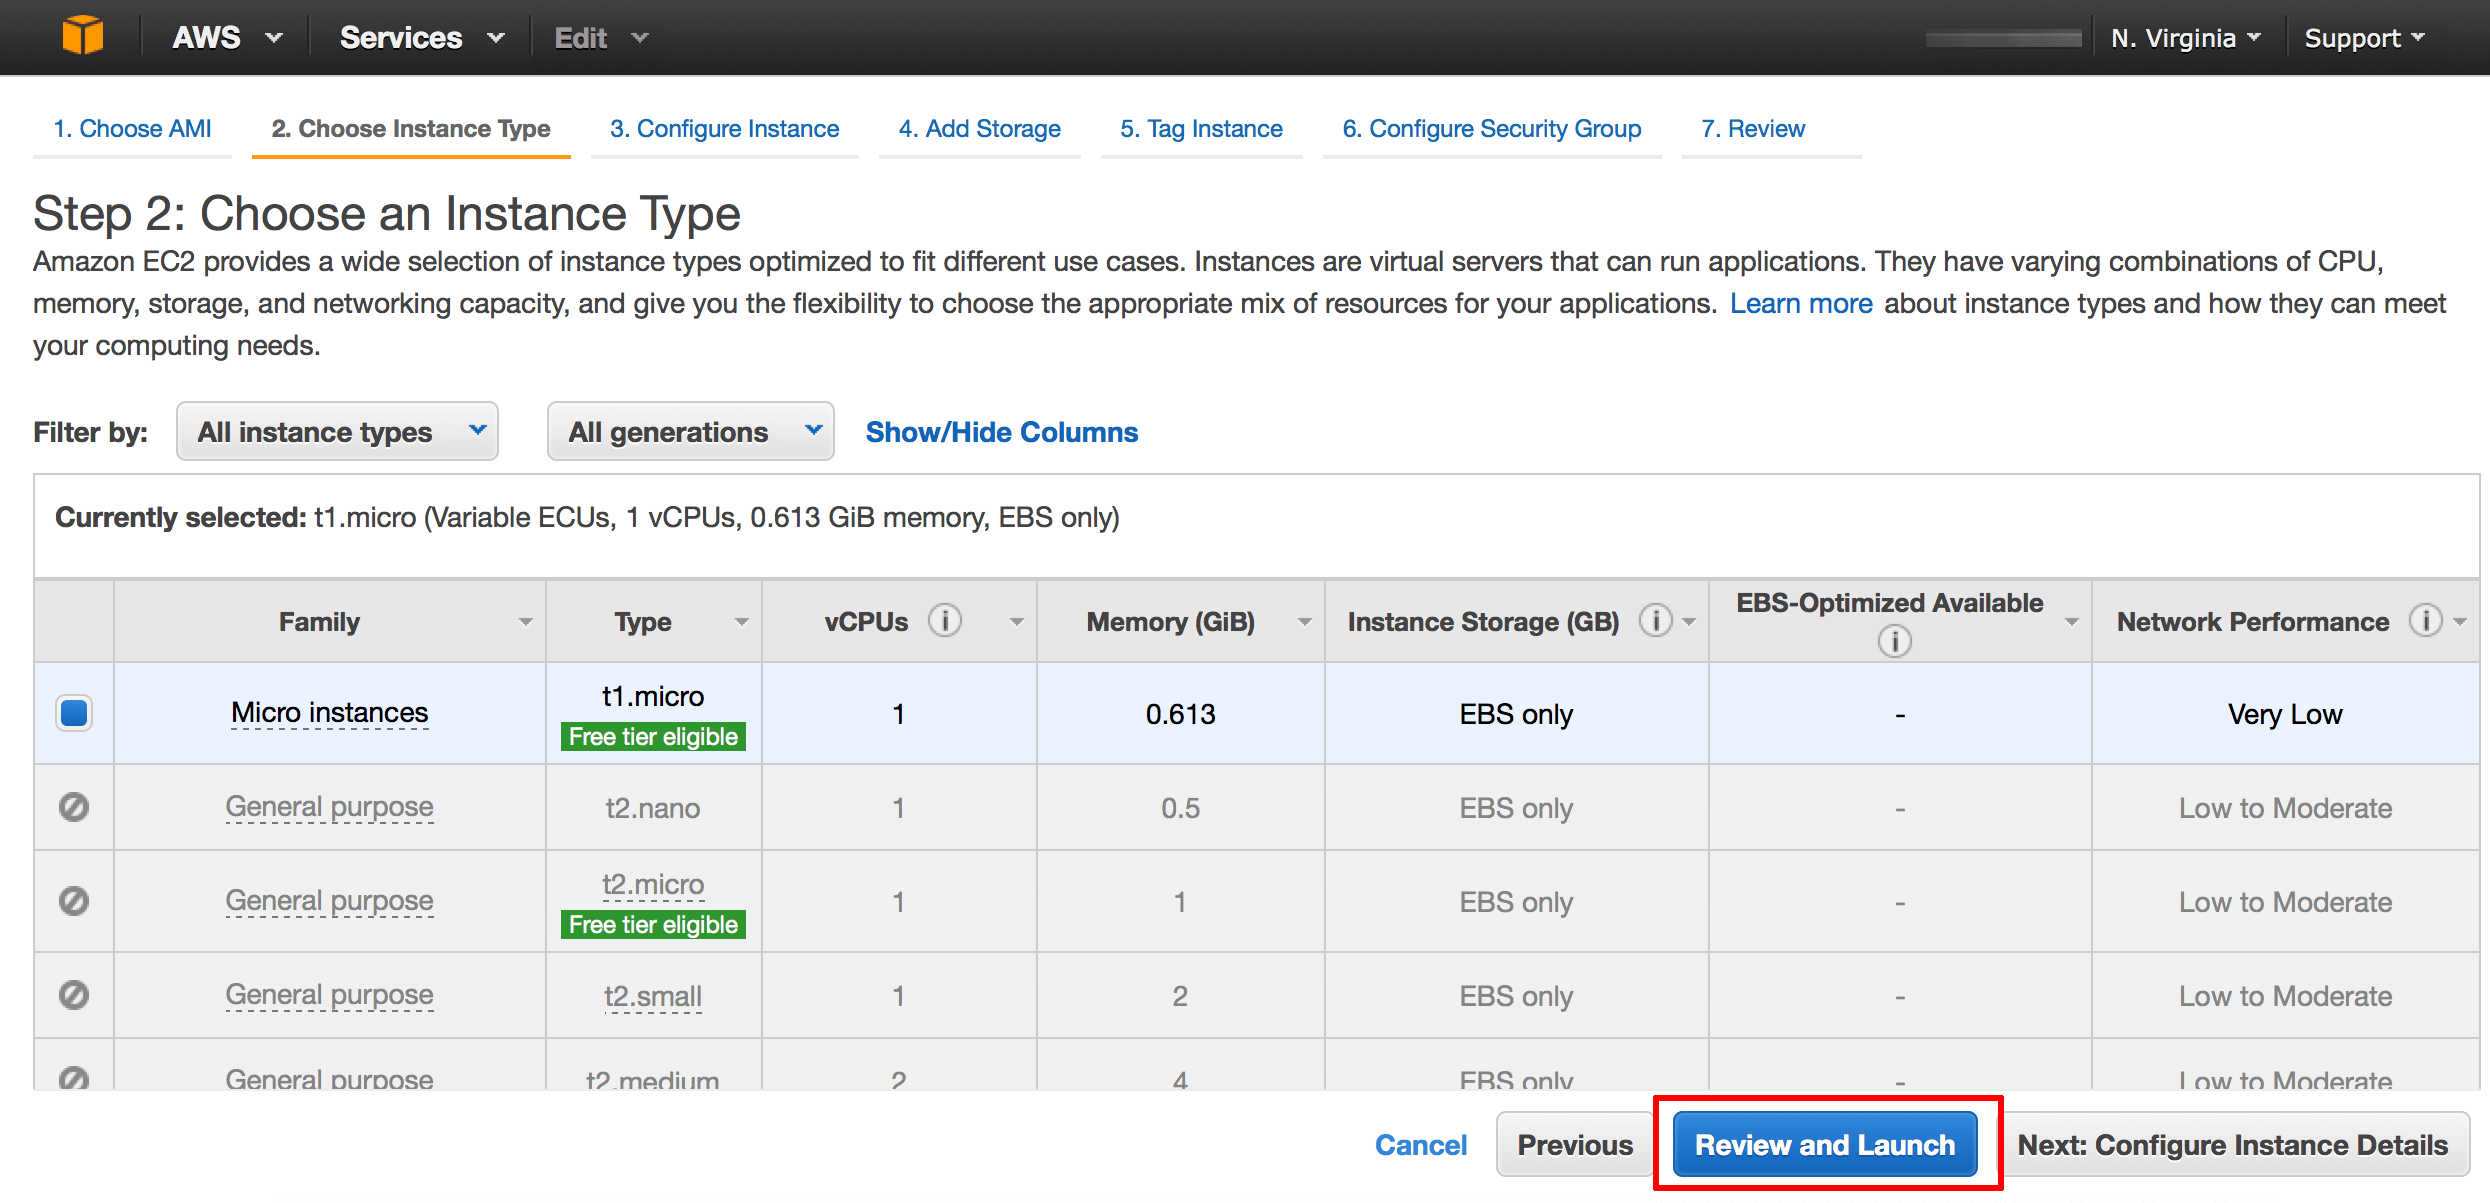
Choose the instance type and click “Review and Launch” for finishing the process.
Source: https://docs.bitnami.com/aws/faq/administration/change-region/
 Working On Ubuntu 20.04, 18.04")